 Thaka.Ai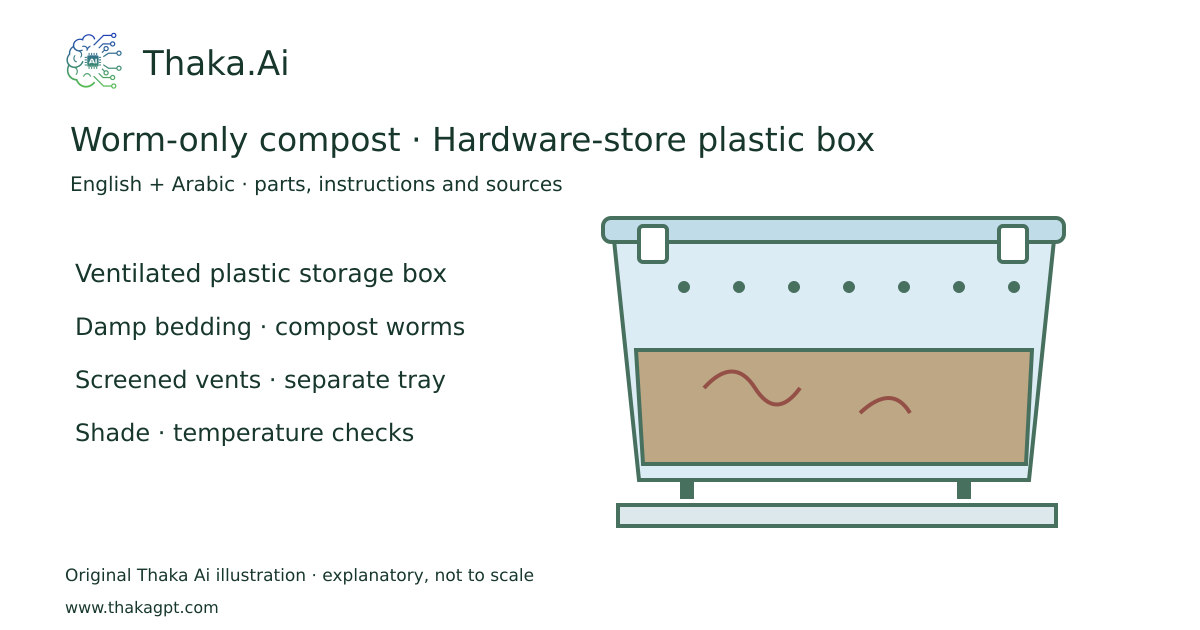
Reviewed 17 October 2026 · schematic not to scale
Turn clean plant scraps into vermicompost in a ventilated, shaded bin. This is a compost process, separate from animal-feed production.
- 1Ordinary opaque plastic storage box; ventilated clip lid
- 2Damp loose paper bedding and compost worms only
- 3Screened upper vents and small bottom drains
- 4Stable spacers and separate drainage tray; no pooling
Site and operating requirements
- Separate waste from feed and drinking water. Record input history, temperature, moisture, runoff and compost quality.
Tools and measuring equipment
- Dedicated gloves, labelled containers, thermometer, moisture checks, cleaning tools and a batch log.
Output and operating conditions
Vermicompost and a contained compost-worm culture. No guaranteed animal-feed yield.
Iowa State shallow-bin example: about 610 × 914 × 305 mm. Bucket adaptations have different airflow and surface area.Parts, quantities and dimensions
| Part | Quantity | Specification / dimensions |
|---|---|---|
| Opaque bin and loose-fitting lid | 1 | About 610 × 914 × 305 mm; never airtight. Provide a tray and stable spacers. |
| Drill and screened vents | 1 | Source example: 1.6 mm bottom drain holes 51–76 mm apart; 6.4 mm upper vents. Deburr and screen against pests without blocking air. |
| Bedding, worms and plant scraps | 1 | Damp shredded plain paper/cardboard, small amount of clean grit and identified compost worms such as Eisenia fetida; do not collect unknown outdoor worms. |
Preparation and component checks
- Read the complete linked method, mark its edition, and create a measured component list and a labelled sketch before starting. Keep experimental changes separate from the published procedure.
- Prepare the work area and inspect every component. Run the lowest-risk dry or unpowered check before water, heat, moving parts or crop material are introduced.
Procedure
- 1
Mark, drill and deburr the empty bin; fit pest screening and test drainage over the tray.
- 2
Soak plain bedding, wring to a damp sponge texture and fluff loosely. Keep air spaces.
- 3
Place the bin in shade at a measured temperature. The source favours about 18–21°C; Kuwait summer heat needs a controlled location.
- 4
Introduce identified worms and let them settle. Bury a small weighed portion of chopped vegetable scraps under bedding.
- 5
Feed only as the previous portion disappears. Spread feed locations; cover with bedding. Do not treat an established-bin feeding estimate as a starting dose.
- 6
When dark crumbly material dominates, move finished material to one side and fresh bedding/food to the other; allow worms to migrate before harvesting.
Safety and inspection
Keep this waste stream out of animal feed. Wear gloves, wash hands and prevent runoff. Do not apply untreated leachate to edible plant surfaces.
Verify the result
Log inputs, moisture, temperature and harvest mass. Compost appearance alone does not demonstrate pathogen removal.
Measurement log
- Date, source materials, measured dimensions, inputs, weather/temperature, care, pests/odour, test results and output. Keep batch and location labels.
Maintenance and repeat checks
- Check temperature, moisture, odour and escapes daily at first. Sour smell: stop adding food, remove rotting pockets and add dry bedding/airflow.
- Keep meat, dairy, oily/salty food, manure of unknown history and chemicals out. Clean the tray; do not call drainage liquid safe worm tea.
- Keep worms contained; never release them into natural soil. Use mature compost according to soil testing.
Troubleshooting
- Unexpected decline, pests, odour, poor growth or animal distress
- Pause the affected activity, separate suspect material and check the guide’s moisture, heat, hygiene, drainage and care requirements. Get a qualified diagnosis before treatment or reuse.