 Thaka.Ai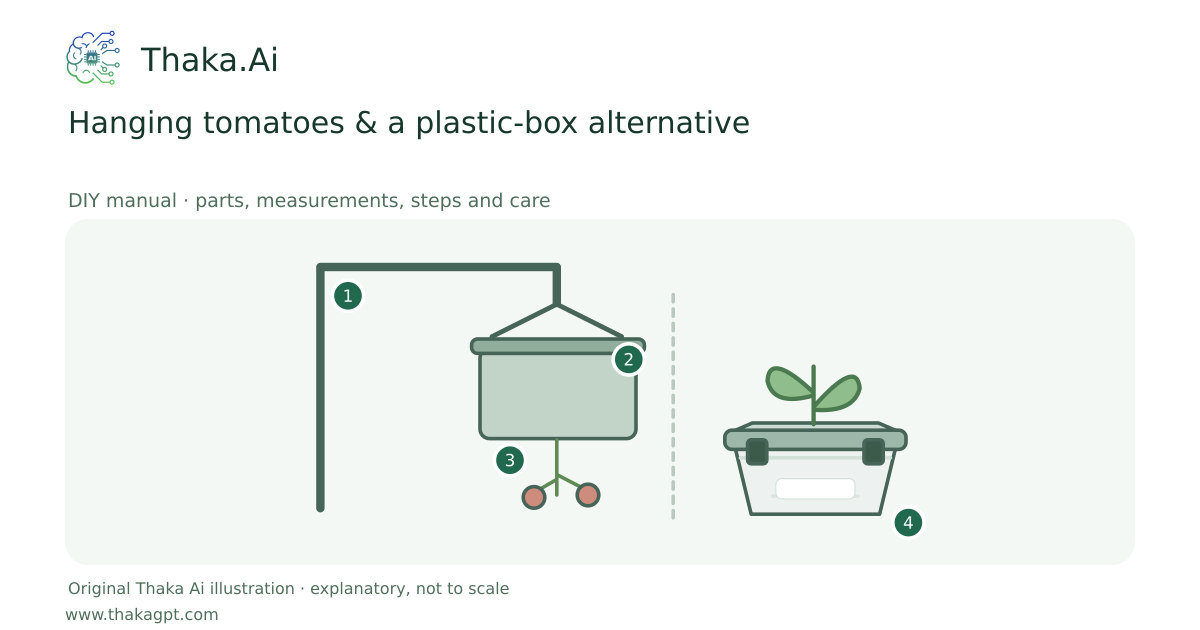
Reviewed 17 October 2026 · schematic not to scale
Compare an upside-down tomato planter with the simpler ground-supported plastic-box option. Use a rated hanging product rather than suspending an ordinary storage box.
- 1Manufacturer-rated hanging planter and support
- 2Secure lid, drainage and smooth stem opening
- 3Small suitable tomato; full wet mass checked
- 4Ground-supported plastic-box alternative
Site and operating requirements
- Identify crop, season, water quality, soil/medium and local heat. Measure materials before cutting and confirm support and drainage.
Tools and measuring equipment
- Tape, level, watering measure, gloves and the planter manufacturer’s specified installation tools.
Output and operating conditions
One accessible tomato-growing pilot. Inversion does not guarantee higher yield or eliminate watering and nutrition needs.
Missouri State’s published bucket example is about 19 L with a 51 mm bottom opening and roughly three-quarters filled with potting mix. These measurements do not rate a different plastic box for hanging; follow the purchased planter’s manual.Parts, quantities and dimensions
| Part | Quantity | Specification / dimensions |
|---|---|---|
| Rated hanging planter OR ground-supported plastic box | 1 | For hanging, use a purpose-made product with a matched support and lid. For the simpler upright route, select a clean crop-compatible draining box with root volume suited to the cultivar. |
| Support and anchorage | 1 set | Supplier must account for saturated mix, retained water, fruit, planter and wind. No unsupported roof hooks or generic screw sizes. Keep clear of walkways and children. |
| Tomato, medium and irrigation | 1 set | Choose a suitable small cultivar; clean lightweight potting mix, label-directed feed and accessible watering. Check root volume and light for the selected cultivar. |
Preparation and component checks
- Resolve the full wet load and anchorage before making holes or lifting.
Procedure
- 1
Choose the upright plastic-box option for a first trial unless a supplier has approved the hanging structure.
- 2
If hanging, read the entire product manual and verify the support’s complete wet-load and anchorage rating before filling.
- 3
Set the empty planter at a safe working height. Fit the stem opening protection, lid and drainage exactly as the manufacturer specifies.
- 4
Insert the healthy young plant gently without crushing leaves or stem. Fill to the product’s line with suitable potting mix; do not transfer the source bucket’s cut sizes to another product.
- 5
Water and check drainage over a safe area, then hang only by the approved system. For a plastic box, keep it on a stable ground support and add an appropriate plant stake.
- 6
Inspect plant moisture daily in hot weather and feed as labelled; record growth and compare with the upright pilot.
Ready-to-use checklist
- Chosen product and fully wet mass are approved for the support; drainage works and plant/stem access is safe.
- Resolve any missing critical material, support or operating specification before starting.
Safety and inspection
Consult a competent installer before fixing overhead loads. An ordinary storage-box lid or handle is not a hanging rating.
Verify the result
Chosen product and fully wet mass are approved for the support; drainage works and plant/stem access is safe.
Measurement log
- Date, actual dimensions/working volume, product labels, readings, actions and results. Keep before-and-after photographs.
Maintenance and repeat checks
- Inspect hooks, support, lid and any abrasion before watering and after wind. Take the planter down if any component shifts or cracks.
- Keep the growing mix evenly moist without persistent waterlogging; monitor heat and sun exposure.
Troubleshooting
- Unexpected decline, pests, odour, poor growth or animal distress
- Pause the affected activity, separate suspect material and check the guide’s moisture, heat, hygiene, drainage and care requirements. Get a qualified diagnosis before treatment or reuse.