 Thaka.Ai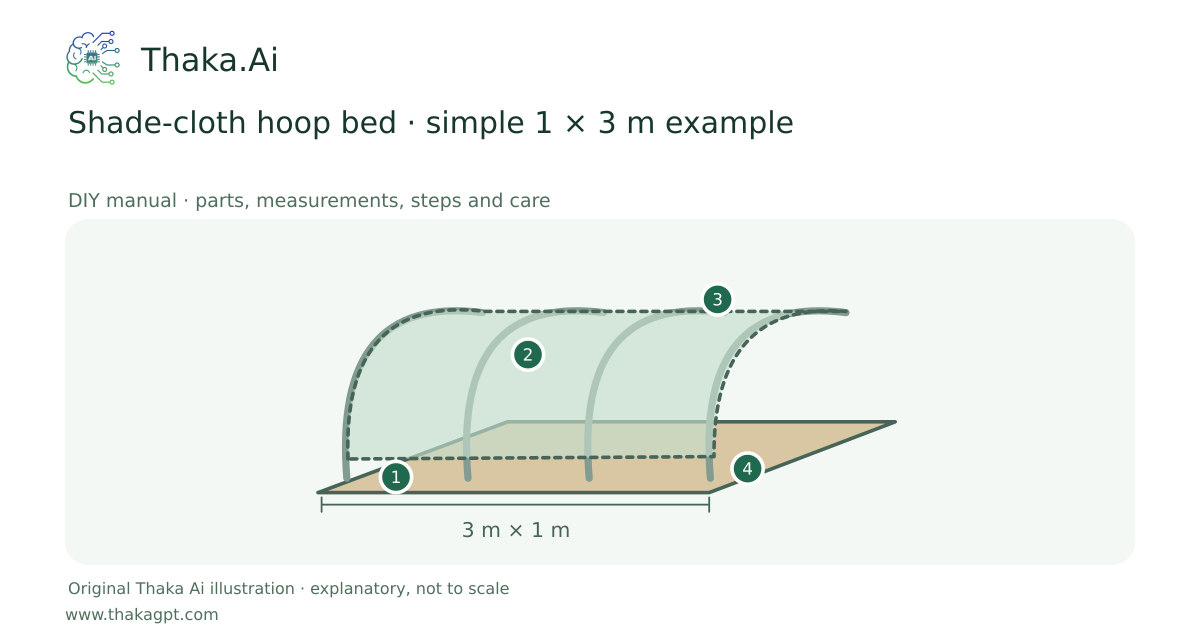
Reviewed 17 October 2026 · schematic not to scale
Add a removable shade cover above a mulched, drip-irrigated bed. Use light shade cloth and preserve open ventilation.
- 1Original example: 1 × 3 m bed
- 2Four hoops, about 1 m apart
- 3Crop-suitable shade cloth and secure clips
- 4Capped anchors, ridge ties and wind checks
Site and operating requirements
- Identify crop, season, water quality, soil/medium and local heat. Measure materials before cutting and confirm support and drainage.
Tools and measuring equipment
- Tape, marker, cold pipe cutter/hacksaw, deburring tool, mallet, protective caps, clips, ties and gloves. Locate buried services before driving anchors.
Output and operating conditions
An accessible shaded crop bed; record crop response and temperature rather than claiming a fixed cooling benefit.
Original sizing example based on UMD hoop guidance: four hoops at 0, 1, 2 and 3 m. Pipe/fabric lengths below need a dry fit; no fixed arch height or wind rating is claimed.Parts, quantities and dimensions
| Part | Quantity | Specification / dimensions |
|---|---|---|
| Flexible hoop pipe | 4 | Nominal ½-inch flexible PVC, initially about 2.4 m per hoop; check actual fit and crop clearance before trimming. Do not heat it. |
| Anchors and safety caps | 8 | Source-type rebar about 600 mm long and 10 mm diameter, roughly 300 mm driven below ground where suitable; cap exposed tips and confirm underground services. |
| Shade cloth and clips | 1 set | Start with ~2.4 × 4 m cloth, matching snap clips, ridge cord and reviewed edge anchors. UMD mentions 30% shade as a crop-dependent starting point. |
| Bed mulch and drip line | 1 set | Use the separate mulch/drip guides; keep cloth and anchors out of footpaths. |
Preparation and component checks
- Read the size notes first. Measure the purchased parts and label every piece before making any cut or hole. Keep access and cleaning space clear.
- Gather the whole shopping list, dry-fit where applicable and keep the complete linked source at hand. Source dimensions and original sizing examples are identified separately.
Procedure
- 1
Mark a 1 × 3 m bed and four paired hoop positions. Check buried services and local wind exposure.
- 2
Prepare the bed, test drip delivery and install suitable mulch before the cover restricts access.
- 3
Drive the anchors to the reviewed depth, maintaining equal pairs. Keep every exposed steel tip capped during work.
- 4
Cold-flex one pipe over a pair, check fit and crop/head clearance, then repeat for the remaining hoops. Never leave bare anchors uncovered.
- 5
Tie the hoop tops into a ridge line, measure the real arch and trim cloth only after allowing fastening and end overlap.
- 6
Clip cloth on, anchor edges and leave air and gardening access. Fold/slide a side for work without loading the plants.
- 7
Inspect movement in mild conditions and adjust anchors. Remove the cover before conditions exceed the reviewed design.
Ready-to-use checklist
- All hoops are secure, no steel tip is exposed, fabric cannot rub the crop and you can water, inspect and harvest safely.
- All edges, supports, drainage and access have been checked. Unknown critical specifications have been resolved before use.
Safety and inspection
Use the specified materials and complete source method. Ask a competent local specialist where site loads, electricity, water safety or unfamiliar tools are involved.
Verify the result
All hoops are secure, no steel tip is exposed, fabric cannot rub the crop and you can water, inspect and harvest safely.
Measurement log
- Date, actual dimensions, material/product labels, water/soil readings, actions, problems and results. Photograph the setup before use and after any change.
Maintenance and repeat checks
- Check clips, abrasion and ground anchors after wind; keep the cloth clean and irrigation accessible.
- Watch crop heat/light response; more shade is not always better. This lightweight tunnel is not a storm or hail shelter.
Troubleshooting
- Unexpected decline, pests, odour, poor growth or animal distress
- Pause the affected activity, separate suspect material and check the guide’s moisture, heat, hygiene, drainage and care requirements. Get a qualified diagnosis before treatment or reuse.