 Thaka.Ai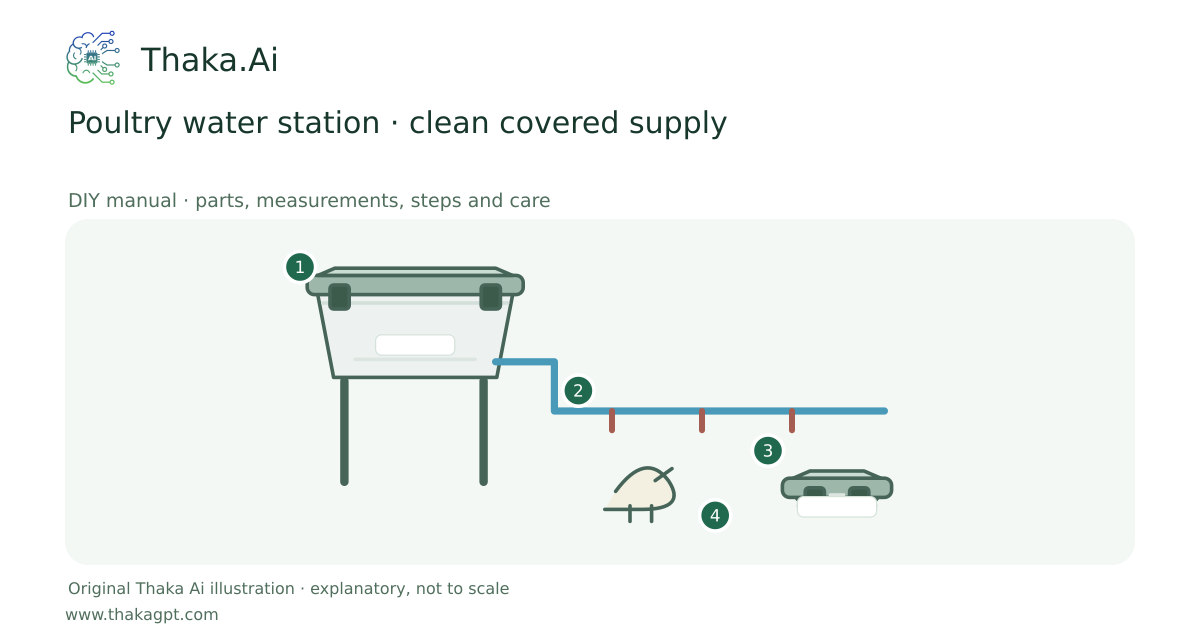
Reviewed 17 October 2026 · schematic not to scale
Connect a suitable drinking-water source to a manufacturer-matched nipple line or drinker. Keep a backup while birds learn the system.
- 1Tested water in a clean covered plastic reservoir
- 2Supported line, filter and OEM pressure setting
- 3Correct nipple height and a backup drinker
- 4Daily bird, flow and hygiene checks
Site and operating requirements
- Confirm species, number, welfare, climate, predator protection and local keeping rules before building.
Tools and measuring equipment
- Tape, level, clean pipe cutter, water test kit, pressure check specified by the drinker maker and labelled cleaning tools.
Output and operating conditions
A monitored clean-water station matched to the birds and the selected drinker equipment.
Tank size, nipple count, mounting height, pressure and drilled hole size are model/flock-specific. Choose these from the actual drinker instructions; an IBC photograph cannot establish them.Parts, quantities and dimensions
| Part | Quantity | Specification / dimensions |
|---|---|---|
| Covered suitable drinking-water reservoir | 1 | Use verified suitable water, a clean known-history reservoir and manufacturer-rated support. Do not use unknown chemical containers. |
| Matched drinker kit | 1 set | Nipples/drinkers, regulator/filter if required, tubing, end flush and fittings specified by the same system; no guessed hole/flow values. |
| Test kit, records and backup | 1 set | Appropriate water laboratory assessment, clean backup drinker and daily availability/leak log. |
Preparation and component checks
- Read the size notes first. Measure the purchased parts and label every piece before making any cut or hole. Keep access and cleaning space clear.
- Gather the whole shopping list, dry-fit where applicable and keep the complete linked source at hand. Source dimensions and original sizing examples are identified separately.
Procedure
- 1
Identify species, flock size and drinking-water source. Test an alternative supply for relevant microbiological and chemical risks.
- 2
Select the matched kit and record its specified head/pressure, flow checks, mounting height and installation-hole size.
- 3
Fit the clean covered reservoir on its verified base and assemble the line exactly to the kit diagram.
- 4
Flush before use and test the furthest outlet. Check every bird can reach a working drinking point.
- 5
Introduce birds with a clean backup available; observe actual drinking rather than assuming they have learned.
- 6
Check flow, leaks, litter wetness and supply daily; arrange a heat/power/supply-failure response.
Ready-to-use checklist
- Water suitability is verified, outlet delivery is checked and every bird has access plus a backup plan.
- All edges, supports, drainage and access have been checked. Unknown critical specifications have been resolved before use.
Safety and inspection
Use the specified materials and complete source method. Ask a competent local specialist where site loads, electricity, water safety or unfamiliar tools are involved.
Verify the result
Water suitability is verified, outlet delivery is checked and every bird has access plus a backup plan.
Measurement log
- Date, actual dimensions, material/product labels, water/soil readings, actions, problems and results. Photograph the setup before use and after any change.
Maintenance and repeat checks
- Clean reservoir and flush lines by the water-management/product plan; replace filters at the specified interval.
- Roof runoff, a first-flush unit and nipple drinkers are not a treatment process. Use verified suitable drinking water meanwhile.
Troubleshooting
- Unexpected decline, pests, odour, poor growth or animal distress
- Pause the affected activity, separate suspect material and check the guide’s moisture, heat, hygiene, drainage and care requirements. Get a qualified diagnosis before treatment or reuse.