 Thaka.Ai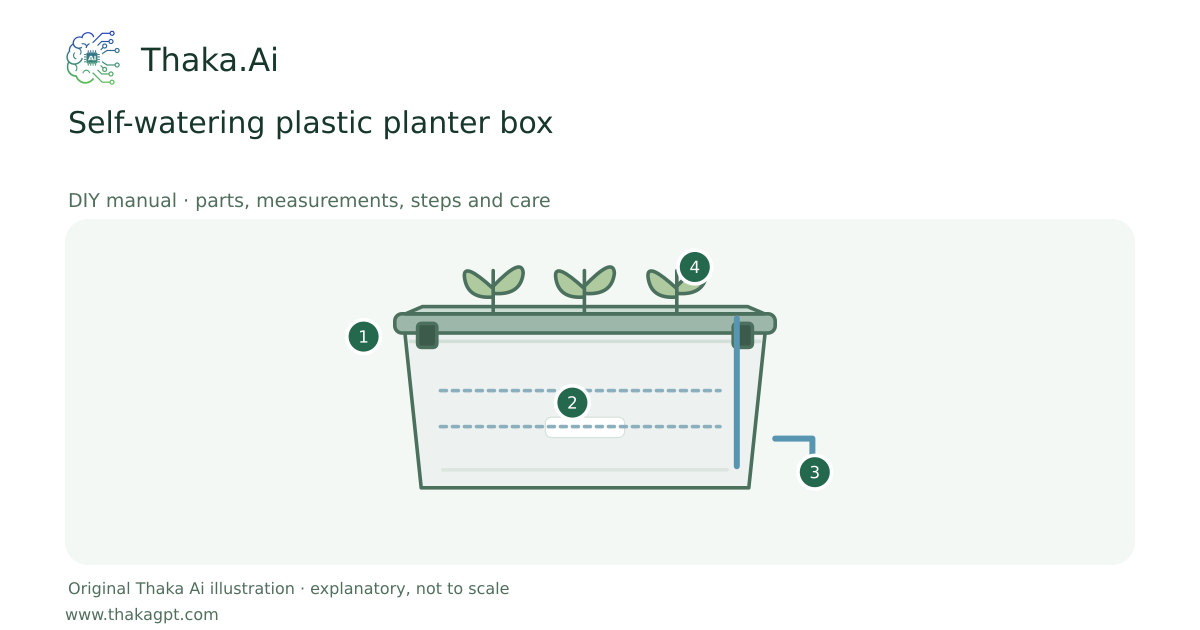
Reviewed 17 October 2026 · schematic not to scale
Create a modern rectangular planter with a concealed reservoir, overflow and a wicking soil column.
- 1Measured clean plastic storage box
- 2Supported divider and compatible growing medium
- 3Separate fill and overflow below the support deck
- 4Monitor water, roots and wet load
Site and operating requirements
- Identify crop, season, water quality, soil/medium and local heat. Measure materials before cutting and confirm support and drainage.
Tools and measuring equipment
- Tape, marker, saw and suitable drill bit
- Clamps, eye protection and deburring tool
Output and operating conditions
Published box benchmark: about 68 L, a 152 mm diameter wicking pot and 51–76 mm fill pipe. Actual outer dimensions depend on the chosen box.
Capillary irrigation principle. The reservoir is not an indefinite water supply; refill demand changes with crop size and heat.Parts, quantities and dimensions
| Part | Quantity | Specification / dimensions |
|---|---|---|
| Rectangular plastic storage box with lid | 1 | About 68 L source benchmark; choose UV-suitable, known-history material and measure internal dimensions. |
| Wicking pot and supported divider | 1 set | 152 mm diameter pot; trim the divider to the actual interior. Four equal-height pipe supports carry the divider. |
| Fill pipe and overflow | 1 set | Fill pipe 51–76 mm diameter, extending above the box; overflow 76–102 mm above base and below the divider. |
| Lightweight potting mix and screen | to measured volume | Pre-moisten the mix; fit removable insect protection without blocking the overflow. |
Preparation and component checks
- Verify the divider support and safe material before filling.
- Plan where overflow will drain without damage.
Procedure
- 1
Place the empty box on a level load-capable surface and measure the actual inside dimensions.
- 2
Mark and cut the divider to fit, with a central opening holding the wicking pot and a corner opening for the fill pipe.
- 3
Fit equal supports and dry-fit the divider; the assembly must support wet medium without collapsing.
- 4
Drill the side overflow below the divider at the stated benchmark height; smooth edges and fit removable screening.
- 5
Fill the wicking pot and upper box with pre-moistened lightweight mix; plant and water the root area initially.
- 6
Fill the reservoir until overflow appears, cap the fill tube, then monitor moisture and refill before it empties.
Ready-to-use checklist
- Overflow works and all exposed reservoir openings are protected.
- Wicking column is moist and main roots are not submerged.
Safety and inspection
Use safe known-history food-growing plastic and potting mix; do not use old chemical boxes. Keep overflow open and screen exposed water access. A full box is heavy.
Verify the result
Water must rise through the wicking column while overflow prevents the main root zone from remaining submerged.
Measurement log
- Actual box, divider and overflow dimensions.
- Refill volume, frequency and crop condition.
Maintenance and repeat checks
- Check overflow and insect screens for clogs; inspect the box for sun damage and bulging.
- Watch for salt crust and poor growth; assess water quality and flush or renew medium appropriately between crops.
Troubleshooting
- Unexpected decline, pests, odour, poor growth or animal distress
- Pause the affected activity, separate suspect material and check the guide’s moisture, heat, hygiene, drainage and care requirements. Get a qualified diagnosis before treatment or reuse.