 Thaka.Ai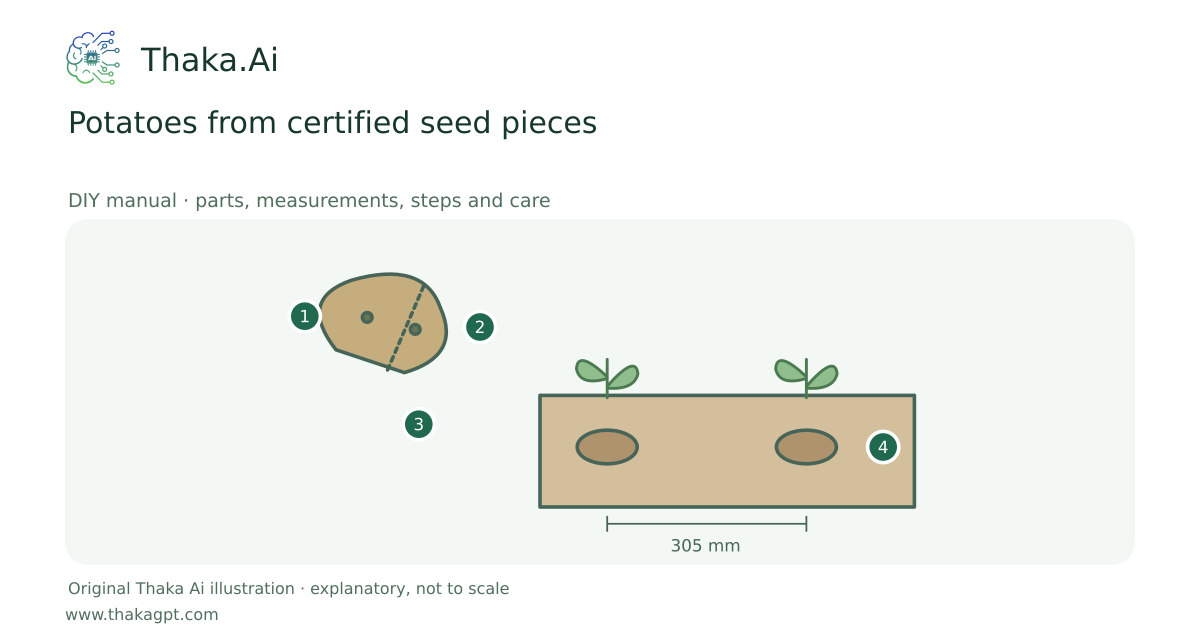
Reviewed 17 October 2026 · schematic not to scale
Propagate potatoes from certified healthy seed tubers, not arbitrary kitchen peelings.
- 1Certified healthy seed potatoes
- 242–57 g pieces with 1–2 eyes
- 3Heal cuts as directed before planting
- 476–102 mm depth; about 305 mm plant spacing
Site and operating requirements
- Identify crop, season, water quality, soil/medium and local heat. Measure materials before cutting and confirm support and drainage.
Tools and measuring equipment
- Clean knife and board, 1 g-resolution kitchen scale, ruler, labels and gloves; keep seed potato equipment separate from food preparation.
Output and operating conditions
Labelled healed seed pieces and a measured planting row; harvest is not guaranteed.
Iowa State example: pieces 42–57 g with 1–2 eyes; heal 1–2 days at 16–21°C in humid conditions; plant 76–102 mm deep. Use a locally suitable cool season.Parts, quantities and dimensions
| Part | Quantity | Specification / dimensions |
|---|---|---|
| Certified seed potatoes | crop sized | Healthy suitable cultivar; avoid supermarket sprout-inhibited or diseased tubers. |
| Clean knife and scale | 1 set | Cut on a clean stable surface and weigh pieces; small suitable tubers may remain whole. |
| Prepared bed and labels | 1 set | Well-drained suitable soil, ruler, planting labels and irrigation. |
Preparation and component checks
- Read the size notes first. Measure the purchased parts and label every piece before making any cut or hole. Keep access and cleaning space clear.
- Gather the whole shopping list, dry-fit where applicable and keep the complete linked source at hand. Source dimensions and original sizing examples are identified separately.
Procedure
- 1
Choose the local planting season and cultivar and inspect certified tubers for damage/disease.
- 2
Cut large tubers to the source piece mass and retain 1–2 viable eyes per piece. Keep tools clean.
- 3
Allow the cut faces to heal under the stated suitable conditions; do not seal wet pieces in an airtight box.
- 4
Mark spacing and plant at the source depth with cut side down; cover gently and label.
- 5
Water for steady suitable moisture without waterlogging and follow local crop earthing-up and pest guidance as growth develops.
- 6
Keep developing tubers covered from light and inspect plants regularly. Harvest/cure according to cultivar and maturity guidance.
Ready-to-use checklist
- Each piece has the correct eyes/mass, the bed drains and the spacing/depth are recorded.
- All edges, supports, drainage and access have been checked. Unknown critical specifications have been resolved before use.
Safety and inspection
Use the specified materials and complete source method. Ask a competent local specialist where site loads, electricity, water safety or unfamiliar tools are involved.
Verify the result
Each piece has the correct eyes/mass, the bed drains and the spacing/depth are recorded.
Measurement log
- Date, actual dimensions, material/product labels, water/soil readings, actions, problems and results. Photograph the setup before use and after any change.
Maintenance and repeat checks
- Remove diseased material from the propagation area and rotate away from susceptible related crops.
- Do not eat green or badly sprouted tubers or feed unassessed potato waste to livestock.
Troubleshooting
- Unexpected decline, pests, odour, poor growth or animal distress
- Pause the affected activity, separate suspect material and check the guide’s moisture, heat, hygiene, drainage and care requirements. Get a qualified diagnosis before treatment or reuse.