 Thaka.Ai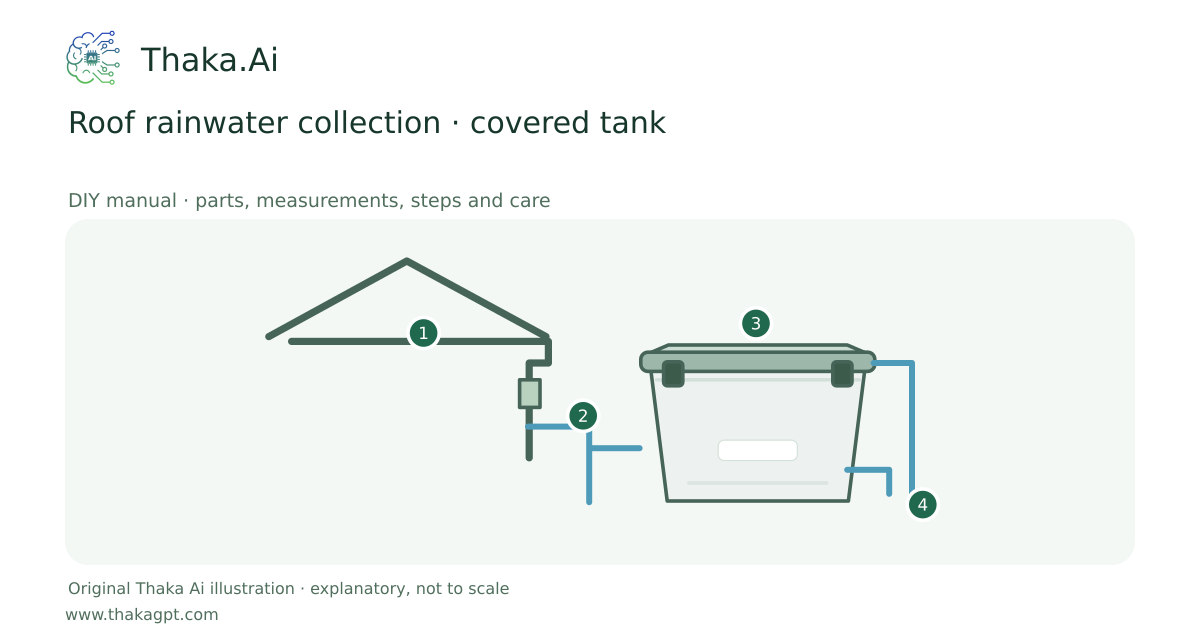
Reviewed 17 October 2026 · schematic not to scale
Collect roof runoff in a dedicated opaque tank for an approved non-drinking use. Add screening, first flush, safe overflow and cleaning access.
- 1Suitable clean roof, gutter and leaf screen
- 2First-flush diversion sized for the site
- 3Closed opaque water-rated plastic tank
- 4Screened overflow and labelled non-potable outlet
Site and operating requirements
- Identify intended use and likely biological, chemical and salt contamination before choosing treatment. Obtain suitable water testing.
- Keep raw-water and treated-water containers, tools and hands separate. Use clean covered storage.
Tools and measuring equipment
- Tape, level and manufacturer-specified gutter/plumbing tools; use a qualified installer for elevated work, tank support or potable-system isolation.
Output and operating conditions
Measured collected water for an approved use; collection alone does not make it drinking water.
Gross litres = roof projection m² × rain mm. A 20 m² roof with 10 mm rain gives 200 L before losses. Tank capacity and pipe sizes come from the selected system; about 1 mm insect mesh is a NSW reference.Parts, quantities and dimensions
| Part | Quantity | Specification / dimensions |
|---|---|---|
| Dedicated tank and support | 1 | New or traceably suitable opaque rainwater tank with fitted access lid. A full 1000 L IBC adds about 1000 kg water plus its own weight; no improvised elevated stand. |
| Gutter, leaf screen and first flush | 1 set | Compatible roof/downpipe materials, removable debris screen and serviceable first-flush diverter. Select diversion volume from catchment condition and guidance, not a universal number. |
| Screened overflow and outlet | 1 set | Insect-screened inlet/overflow, labelled non-drinking outlet, covered penetrations and drainage away from foundations. |
Preparation and component checks
- Read the size notes first. Measure the purchased parts and label every piece before making any cut or hole. Keep access and cleaning space clear.
- Gather the whole shopping list, dry-fit where applicable and keep the complete linked source at hand. Source dimensions and original sizing examples are identified separately.
Procedure
- 1
Inspect roofing, contamination sources and intended use. Measure the horizontal roof catchment and realistic demand/rainfall.
- 2
Select tank/support from the manufacturer and place on a level verified base with maintenance access.
- 3
Clean/repair gutters, then install debris screening and a first-flush unit upstream of the covered tank inlet.
- 4
Fit screened overflow and route it away from buildings and the support pad. Keep all openings protected from insects.
- 5
Fit the labelled outlet and check all joints with clean water; test diversion, drainage and overflow during rain.
- 6
Keep the system separate from drinking-water plumbing. Any mains top-up/backflow arrangement needs appropriate plumbing design.
- 7
Use roof water on food crops or for poultry only after a suitable testing/treatment plan verifies the intended use.
Ready-to-use checklist
- A leak/overflow test passes, openings are screened and water is labelled for its verified use. Clear water is not proof of safety.
- All edges, supports, drainage and access have been checked. Unknown critical specifications have been resolved before use.
Safety and inspection
Use the specified materials and complete source method. Ask a competent local specialist where site loads, electricity, water safety or unfamiliar tools are involved.
Verify the result
A leak/overflow test passes, openings are screened and water is labelled for its verified use. Clear water is not proof of safety.
Measurement log
- Date, actual dimensions, material/product labels, water/soil readings, actions, problems and results. Photograph the setup before use and after any change.
Maintenance and repeat checks
- Inspect roof/gutters about every 3–4 months and tank sediment about every 6–12 months, adjusting for local dust and conditions.
- Reset/empty first flush after rain; clean screens and check lids, mosquito exclusion, leaks and overflow.
Troubleshooting
- Flow/cycle outside the documented range or failed test
- Do not use the output for drinking. Recheck raw-water quality, batch volume, seals/media/device status and the complete source instructions. Retest after correction.