 Thaka.Ai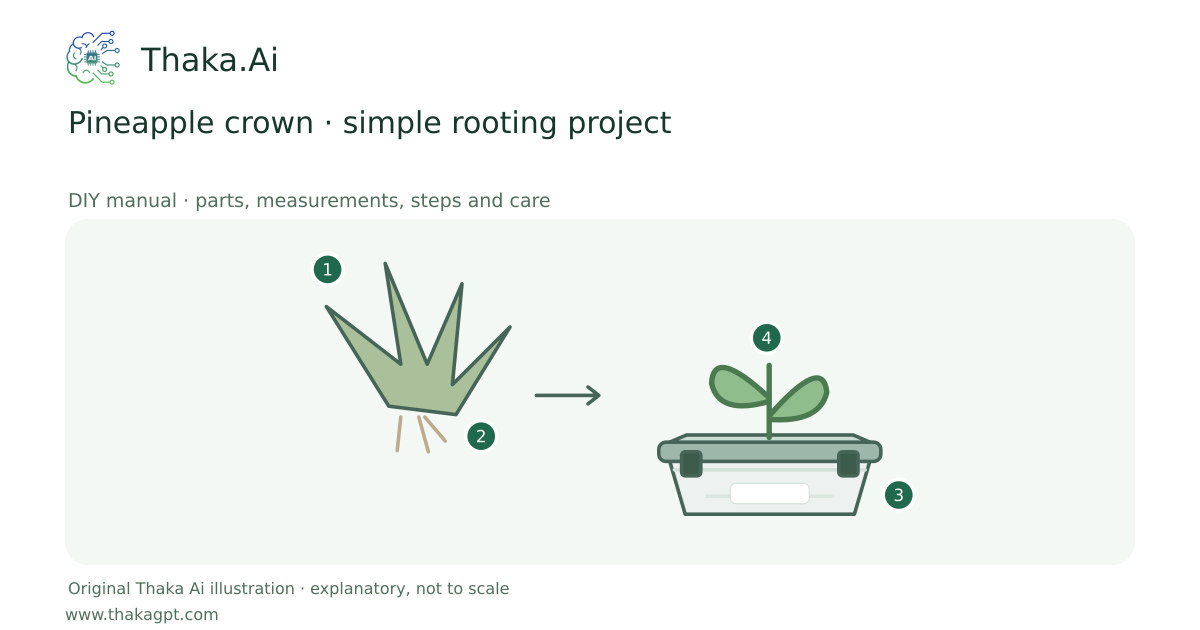
Reviewed 17 October 2026 · schematic not to scale
Root a healthy pineapple crown in a freely draining medium. Rooting is an experiment, not a promise of quick fruit.
- 1Healthy crown with fruit flesh removed
- 2Remove lower leaves; dry the cut
- 3Draining clean plastic propagation box
- 4Bright indirect light; moist medium, no standing water
Site and operating requirements
- Identify crop, season, water quality, soil/medium and local heat. Measure materials before cutting and confirm support and drainage.
Tools and measuring equipment
- Clean knife/board, gloves for leaf edges, labels, water measure and a draining plastic propagation box with clean rooting medium.
Output and operating conditions
A rooted crown after suitable care; fruiting needs long-term conditions and is not guaranteed.
Iowa State example: cut about 25 mm below leaves, remove flesh, dry several days and root to the leaf bases. Roots may take 6–8 weeks; conditions vary.Parts, quantities and dimensions
| Part | Quantity | Specification / dimensions |
|---|---|---|
| Healthy crown and clean knife | 1 | Sound crown without rot, gloves for spiny leaves and stable cutting surface. |
| Draining pot and rooting medium | 1 | Perlite, vermiculite or coarse sand as in source; choose a pot that holds the crown stable without a large wet volume. |
| Later potting mix and label | 1 set | Freely draining suitable mix and clean water; protect from extreme heat/cold. |
Preparation and component checks
- Read the size notes first. Measure the purchased parts and label every piece before making any cut or hole. Keep access and cleaning space clear.
- Gather the whole shopping list, dry-fit where applicable and keep the complete linked source at hand. Source dimensions and original sizing examples are identified separately.
Procedure
- 1
Cut below the leaves and remove attached fruit flesh while preserving the fibrous core at the crown base.
- 2
Remove several lowest leaves to expose the stem base and let the prepared crown dry several days.
- 3
Fill the draining pot with rooting medium and insert only up to the leaf bases.
- 4
Keep in bright indirect light with medium moist, not wet; never leave the pot standing in water.
- 5
Wait for roots and healthy establishment without disturbing the base repeatedly. Remove rotting material rather than watering more.
- 6
After rooting, move to potting mix and retain indirect light another 2–3 weeks before gradually increasing sun.
Ready-to-use checklist
- The crown is stable, the medium drains and independent healthy roots are present before potting on.
- All edges, supports, drainage and access have been checked. Unknown critical specifications have been resolved before use.
Safety and inspection
Use the specified materials and complete source method. Ask a competent local specialist where site loads, electricity, water safety or unfamiliar tools are involved.
Verify the result
The crown is stable, the medium drains and independent healthy roots are present before potting on.
Measurement log
- Date, actual dimensions, material/product labels, water/soil readings, actions, problems and results. Photograph the setup before use and after any change.
Maintenance and repeat checks
- Check drainage, crown firmness and pests; reduce moisture if medium remains saturated.
- Do not bury leaves or expect the social animation’s root growth speed.
Troubleshooting
- Unexpected decline, pests, odour, poor growth or animal distress
- Pause the affected activity, separate suspect material and check the guide’s moisture, heat, hygiene, drainage and care requirements. Get a qualified diagnosis before treatment or reuse.