 Thaka.Ai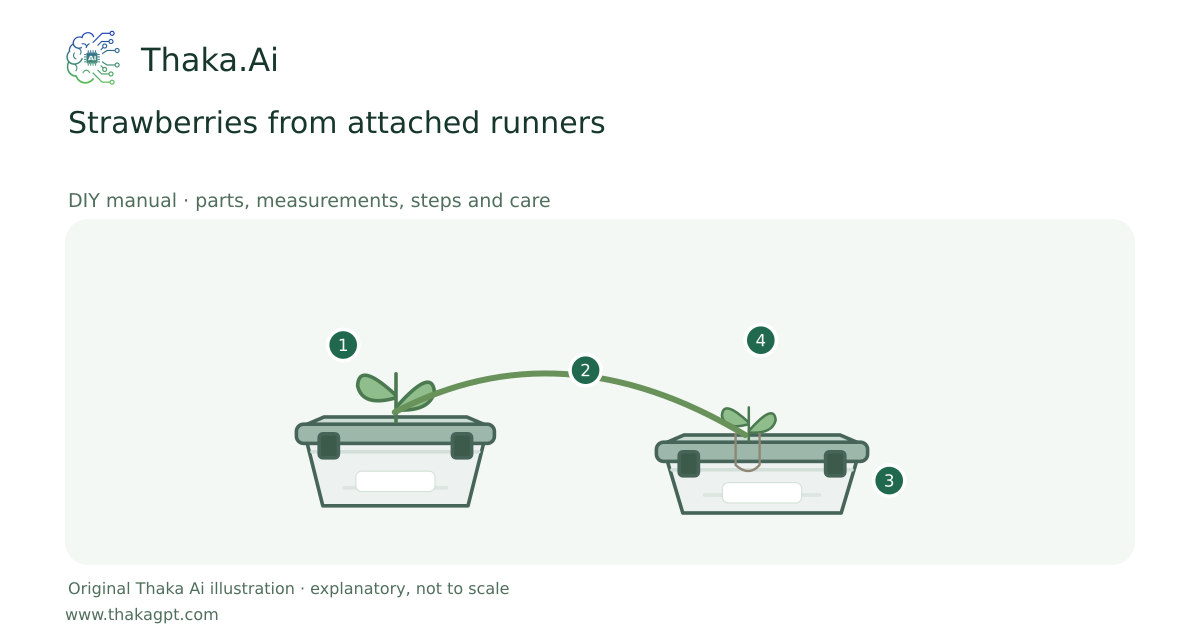
Reviewed 17 October 2026 · schematic not to scale
Root a daughter plant while its runner remains connected to a healthy mother plant.
- 1Healthy identified mother plant
- 2Pin an attached daughter at the medium surface
- 3Clean draining plastic growing box
- 4Detach after independent roots and acclimatise
Site and operating requirements
- Identify crop, season, water quality, soil/medium and local heat. Measure materials before cutting and confirm support and drainage.
Tools and measuring equipment
- Clean scissors, blunt plant pins/ties, trowel, water measure and labels; use a draining plastic propagation box.
Output and operating conditions
Independently rooted healthy daughter plants after observation.
Use visible root development, not a fixed viral timeline. A 100–150 mm nursery pot is an original practical container example, not a universal source requirement.Parts, quantities and dimensions
| Part | Quantity | Specification / dimensions |
|---|---|---|
| Healthy runner-bearing mother | 1 | Do not move runners from a bed with pests/disease. Confirm cultivar and whether you are propagating or prioritising fruit. |
| Draining pot and clean medium | 1 per daughter | Example 100–150 mm pot, supported beside the mother with freely draining medium. |
| Pin, labels and clean scissors | 1 set | A smooth plant pin that holds contact without crushing the crown; ruler and gentle water. |
Preparation and component checks
- Read the size notes first. Measure the purchased parts and label every piece before making any cut or hole. Keep access and cleaning space clear.
- Gather the whole shopping list, dry-fit where applicable and keep the complete linked source at hand. Source dimensions and original sizing examples are identified separately.
Procedure
- 1
Select a healthy mother and a strong daughter node; prepare and moisten the pot without waterlogging.
- 2
Set the pot within the runner’s relaxed reach and place the daughter node against the medium.
- 3
Pin gently for contact, leaving the crown at the surface and leaves above it. Do not bury the crown.
- 4
Keep the runner attached and maintain suitable moisture while roots establish; label the date.
- 5
Check for an independently rooted plug before cutting the connection with clean scissors. Avoid pulling roots to test them.
- 6
Acclimatise and transplant at the cultivar’s spacing with the crown at the correct height.
Ready-to-use checklist
- The daughter remains upright with its own roots and healthy crown before detachment.
- All edges, supports, drainage and access have been checked. Unknown critical specifications have been resolved before use.
Safety and inspection
Use the specified materials and complete source method. Ask a competent local specialist where site loads, electricity, water safety or unfamiliar tools are involved.
Verify the result
The daughter remains upright with its own roots and healthy crown before detachment.
Measurement log
- Date, actual dimensions, material/product labels, water/soil readings, actions, problems and results. Photograph the setup before use and after any change.
Maintenance and repeat checks
- Inspect moisture and disease regularly; nursery pots dry quickly in heat.
- Many fruiting day-neutral systems remove runners to prioritise fruit; propagation and fruiting goals differ.
Troubleshooting
- Unexpected decline, pests, odour, poor growth or animal distress
- Pause the affected activity, separate suspect material and check the guide’s moisture, heat, hygiene, drainage and care requirements. Get a qualified diagnosis before treatment or reuse.